
How to configure metafields for product comparison page ?
With Equate - Product Compare, it is possible to show metafields on product comparison page. So that store visitors can compare products easily with each small details you are managing with product metafields.
Here are the steps you can follow -
- Open Equate in your Shopify store admin > Apps
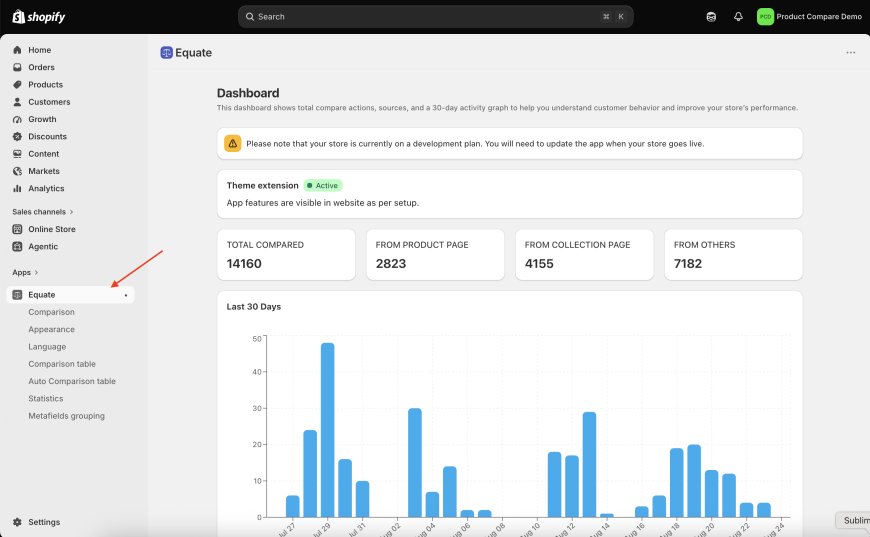
- Find Metafields grouping menu given in the left hand sidebar - as seen in the screenshot below,
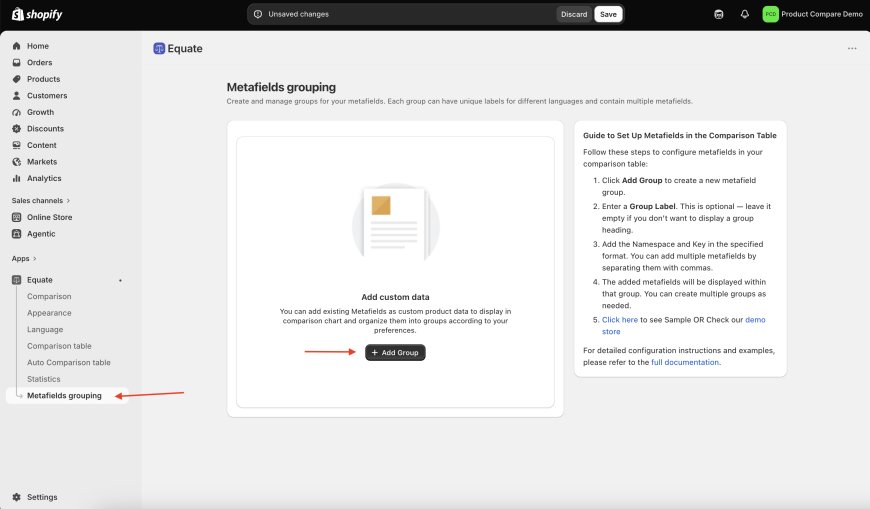
- Click Add Group to add metafield group for product comparison table.
It will give you options as shown in the screenshot below -
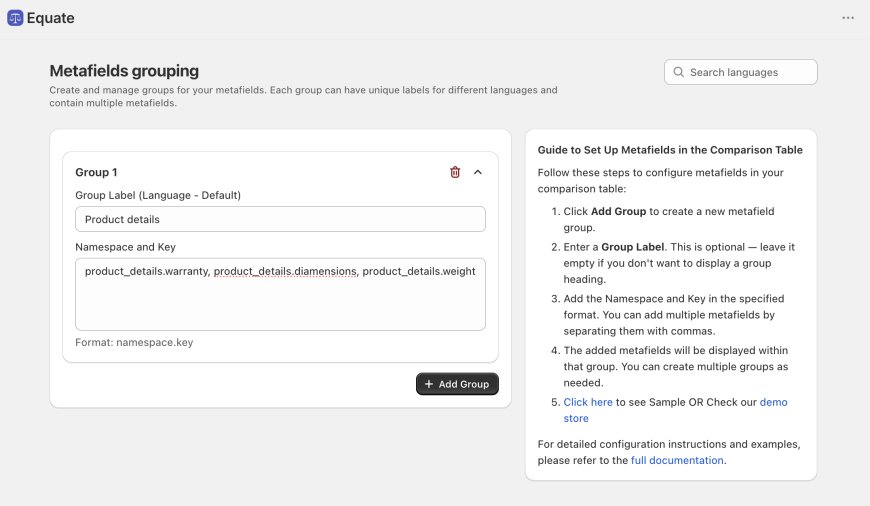 Each group contains:
- Group Label (Default) – The name displayed for the group for metafields on the comparison page. You can put it blank as well
- Namespace and Key – Defines which product metafields should be included in the group.
For example:
- Group Label: Product Details
- Namespace and Key: product_details.warranty, product_details.diamensions, product_details.weight
This configuration will group all metafields that belong to the defined namespace and key under the Product Details section
-
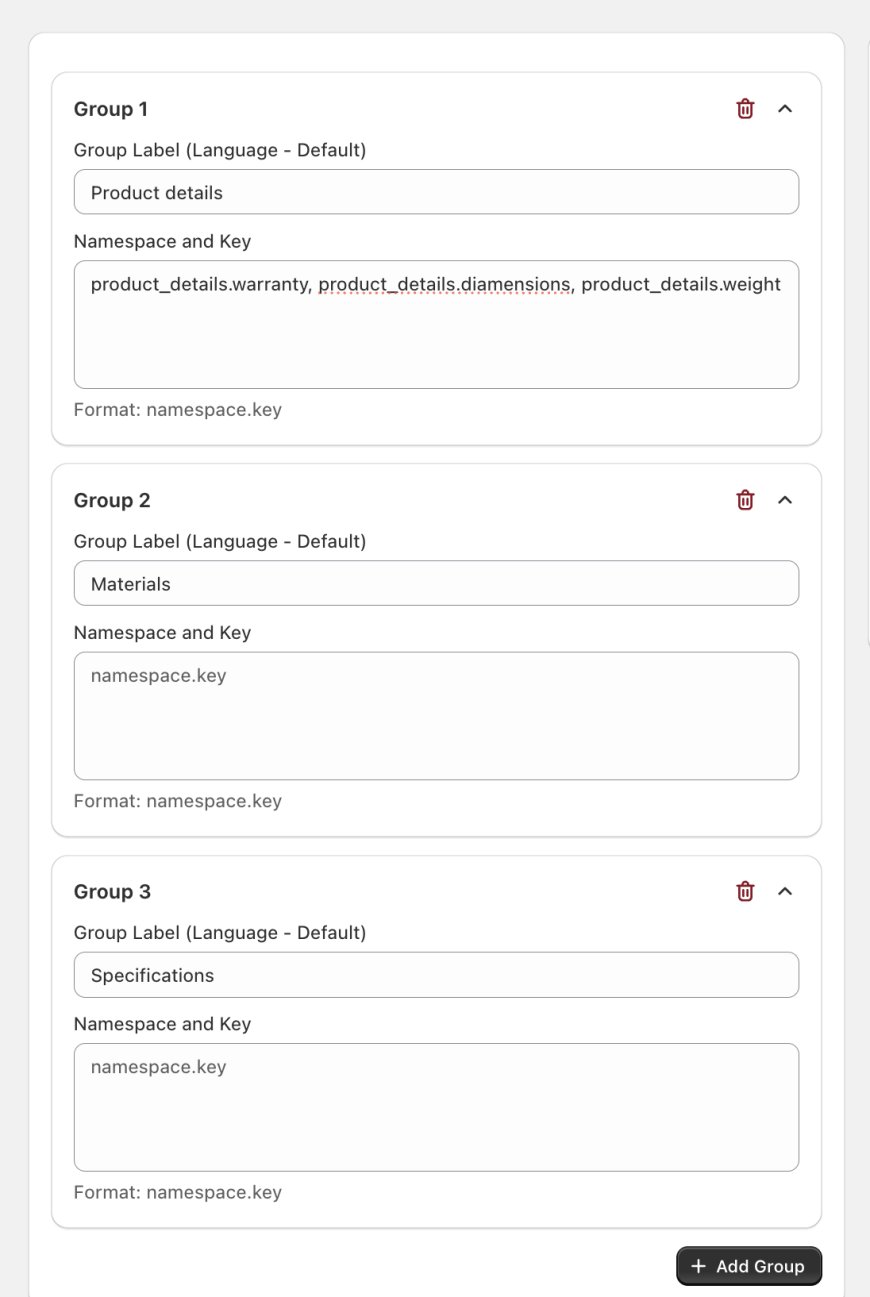
You can create multiple groups, as per your requirement - such as,
- Product details
- Materials
- Specifications
- Features
etc.
- Product details
- Configure Namespace and Key
Enter the metafield namespace and key using this format: namespace.key
example: product_details.warranty
If you want to include all metafields within a namespace, you can use: product_details.*
example:
If your products have the following metafields:- product_details.warranty
- product_details.material
- product_details.weight
- product_details.color
To include all metafields in the group use like: product_details.*
This is useful when you have multiple metafields under the same namespace and want them to be automatically included without adding each metafield individually. - Configure Different Languages
The Metafields Grouping page also allows you to configure group labels for different languages.
Use the Search languages field to find the language you want to configure.
For example, if the default group label is: Warranty
You can provide translated labels for supported languages, such as:- English: Warranty
- French: Garantie
- German: Garantie
- Spanish: Garantía
The appropriate label will be displayed based on the customer's selected language. - Save Your Configuration
After configuring your groups and metafields, make sure to save your changes.
The configured metafields will then be available for displaying product information on your Product Comparison page. 👍